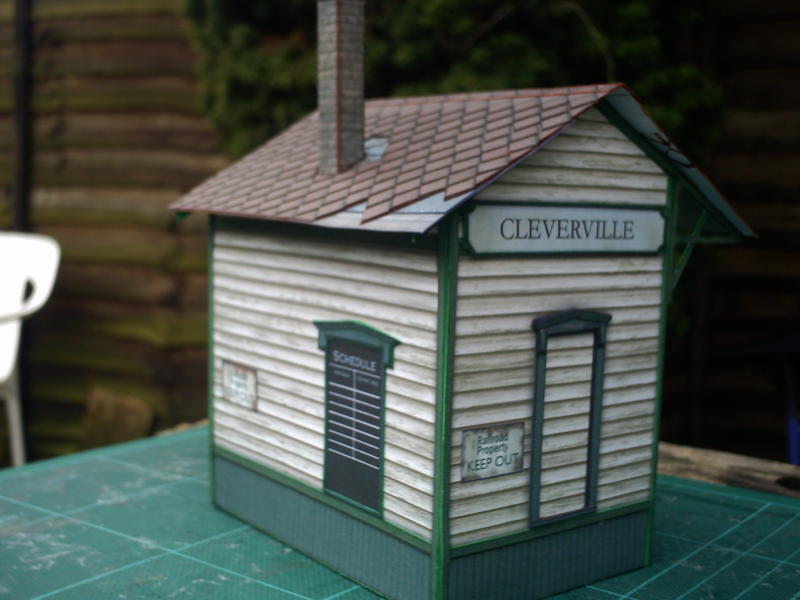
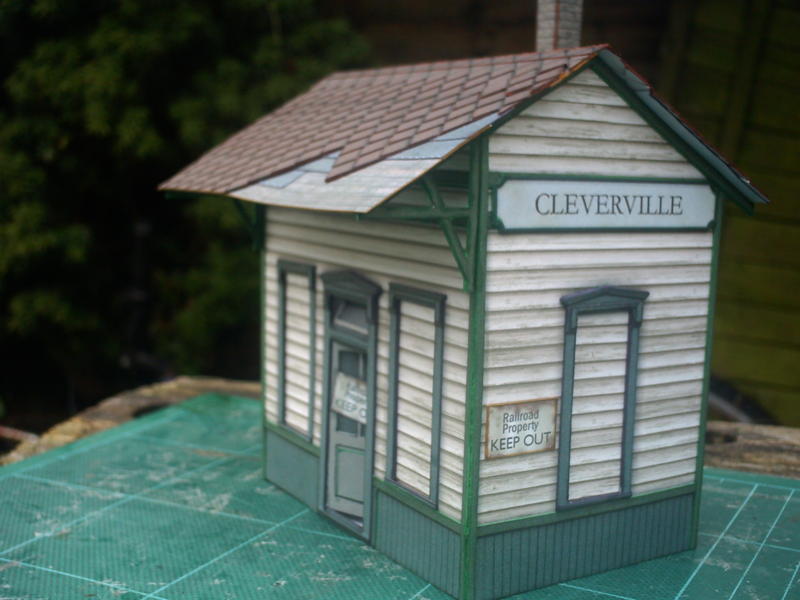
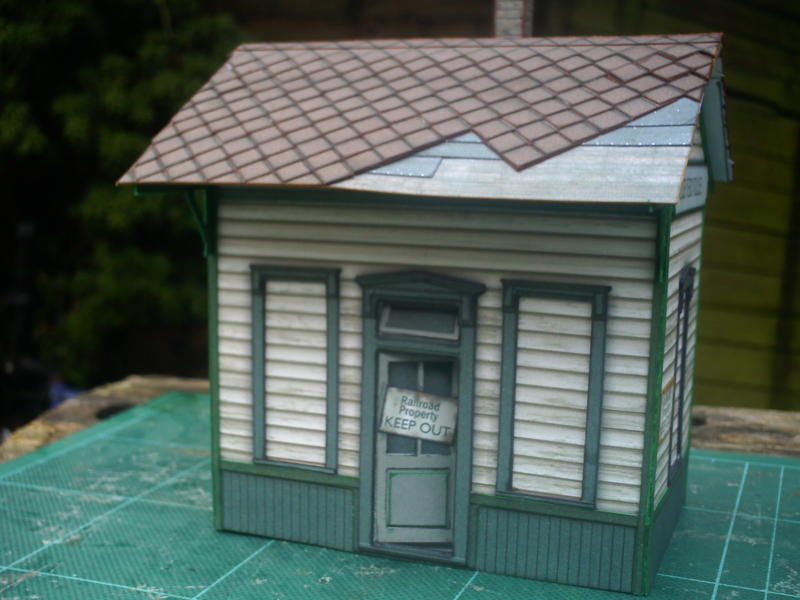
I had promised Dave Miecznikowski that I would relate my first time experiences with Clever Models and cardstock models in general, because we have been exchanging emails and he has been real helpful. I am starting to model in S Scale trains since I had American Flyer trains as a kid (still have them) and would like to build a hi-rail semi-scale small shelf layout for them. Since I am in the planning stages, I looked at various structures and came across Clever Models. I had never done a card stock model before so I was a bit leery in attempting one. I saw the O gauge flag stop in the “freebies” section so decided to give it a shot (especially since the maximum cost on my part would be some cardstock and time (thanks for that C.M.)). I first read all the hints on the web page and started in. The first thing I did was to scale for S scale by reducing 75%. Tips that I found useful were:
1) use SHARP exacto blades and use a “self-healing” cutting surface. I used a piece of emory paper to “strop” the blade to extend its usefullness.
2) for inside corner cuts, poke a hole in the corner with a pin. When cutting, put the tip of the knife and cut AWAY from the hole. Of course use a metal straight edge for the cuts.
3) I had a lot of problems coloring the cut edges of the cardstock. I had purchased cheap colored felt tip markers to do this. DON’T! using them forced some new printouts on fresh cardstock. I still don’t have the hang of doing this, so I ended up painting the edges, and the finer cut pieces, like the window moulding. In modeling, as in real life, paint can hide construction flaws.
4) Don’t rush! I did, and ended up marring some wall surfaces with paint. Obviously, the painter who was hired by the RR to paint the flagstop was not a perfectionist. This is true in all modeling.
5) I mounted the roof and some wall surfaces on thin styrene sheet for strength. Of course this creates a laminate and using a marker probably wouldn’t work for the styrene edges. That is one for me to try. I also used plastic structure pieces to strengthen the corners.
6) I had at first tried 60 weight paper and this seemed flimsy to me, so I switched to 120 weight. My printer has no problem with this so I found that easier. For the roof I used regular printer paper since I laminated it to sheet styrene.
7) When creating folds, use a metal rule as a “brake” to make clean folds.
8) The finished model is certainly not up to “John Allen” standards but will be placed at the “back” of the layout so the many flaws won’t be seen, but the model more importantly served as a learning experience. As with all things, the more you practice, the better you get.
Dave M.


 Dave
Dave